Facebook is the largest social networking website in the world. This is why many websites integrate with Facebook in various different ways such as by adding a facebook like box, facebook comments, facebook like button, and facebook send button. Many websites claim that by adding these social elements they were able to increase user engagement. In this article, we will show you how to add facebook recommendation bar in WordPress, so you can further increase the engagement on your site. Facebook recommendation bar adds a like button at the bottom of the screen which expands as a user scroll downs and show them articles they might want to read on your website.
First thing you need to do is install and activate the Facebook plugin. After activating the plugin, click on the Facebook menu item in your WordPress admin sidebar. This will take you to plugin settings page.
Create a Facebook App
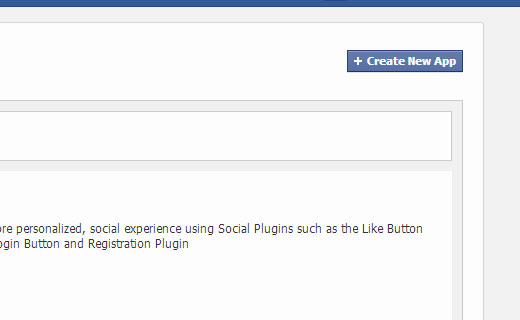
In order for the Facebook Recommendations bar to work, the first thing you need to do is setup a Facebook App. It is very easy and simple to create a Facebook app for your WordPress website. Log in to your Facebook and then go to the Facebook Developers website. This is the place where facebook developers can manage their apps. To get started, click on Create New App button.

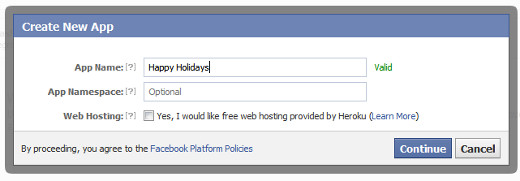
This will bring a small pop up on the screen where you need to provide a name for your app. The other two fields in this form are optional, and you can leave them blank.

Now you will land on developer page for your app, and it will display your application ID and application secret key. You need to copy these keys and enter them into the Facebook plugin page on your WordPress website.
Setting up Facebook Recommendation Bar
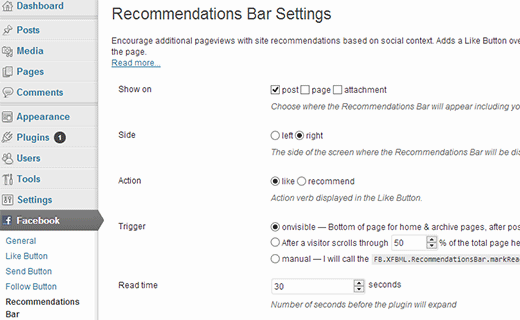
Once you have provided app ID and secret key, additional modules including the Recommendation bar will appear under the Facebook menu. Go to Facebook » Recommendations Bar to configure the settings.

The settings page for Facebook Recommendations bar is fairly simple. First, you need to choose which pages you want the recommendations bar to appear. You can choose from post, page, and attachment. You can select all three of them if you want. The next setting is the direction of the Recommendations bar. By default it appears at the bottom of the page, but you can choose whether you want it on the bottom right or bottom left corner. The next setting item allows you to choose between Recommend or Like action items.
The most important setting item is trigger which controls when the recommendations bar will appear and expand. You can leave it to default which is on visible and triggered when a user scrolls to the bottom. You can also set a percentage, like when user scrolls 60% of the page trigger the recommendation bar. Lastly, you can manually call the recommendations bar by copy pasting the FBML tag in your templates.
After saving changes, visit your website to see the recommendations bar in action. This is how it looked like on our test site:

We hope this article helped you add the Facebook Recommendations bar to your WordPress website. For feedback and questions please leave a comment below. By the way don’t forget to follow us on Facebook.
To leave a comment please visit How to Add Facebook Recommendation Bar in WordPress on WPBeginner.
via WPBeginner http://feeds.wpbeginner.com/~r/wpbeginner/~3/3FUSoCLaou0/
WordPress Hosting Tips
No comments:
Post a Comment